So, HowtoForge has a perfect desktop for PCLinuxOS 2007…how about something similar for 2008 MiniMe? I won’t go into near as much detail as they do there but I’ll go over how I get my desktop up and rolling after a fresh install of PCLinuxOS Minime 2008.
MiniMe is the lesser known offspring of PCLinuxOS 2007 that ships with a 2.6.22.15 kernel and is a minimalistic installation of the KDE desktop 3.5.9. Texstar provides this distribution for those wanting to remaster their installations…it’s a base for other remastered projects like PCLinuxOS Gnome. Remastering and the Make LiveCD wizard enable users to customize their distribution and make a bootable backup CD with all their customizations OR release their own customized distribution. You can also use the Make LiveUSB wizard to create your very own thumbdrive PCLinuxOS.
I found it strange that no one had written anything about MimiMe-to on getting PCLinuxOS 2008 MiniMe up and running as a desktop replacement so I decided to give it a go. The aim of this article isn’t to copy Howtoforge’s great series on perfect installations…but to show how I get PCLinuxOS 2008 Minime up to a perfect installation for me. This means all web video, audio, fonts, and tools I need are installed. So let’s get at it.
What Do We Need?
First and foremost, do a complete upgrade of your fresh installed system. Open Synaptic >> Reload >> Mark all Upgrades >> Apply. It’s going to take a while to get all the updates you’ll need. Do NOT enable the testing repository until after you install your graphics driver at the end of this article…just perform a straight update from main.
Now let’s start installing stuff that is needed on a daily basis. I’m more of a lightweight type of guy so I don’t need robust office applications so my tastes may not line up with yours. Please substitute applications where you see fit…the repositories most likely have them.
To give a brief, high level overview of my daily use applications:
- firefox3
- Opera
- K3B
- konversation
- pidgin
- skype_static
- koffice
- gimp
- Amarok
- claws-mail
- kdeaddons-kate
- kdeaddons-ark
- kdegraphics-ksnapshot (for taking screenshots)
Those are the high level applications I use on a daily basis to get things done. Whenever you are prompted to mark other packages for install, go ahead and and choose “mark”. Click apply and let the your daily use applications install.
Handy Wizards for PCLinuxOS 2008
MiniMe 2008 comes with some handy wizards for you to use to get started. On your desktop after install is a folder called “Utilities”. If you open this folder up, you will find the following options:
- ATI-Nvidia Driver Install
- Alsa Sound Configuration
- Internet Setup
- Make LiveCD
- Make LiveUSB
- Redo-MBR
- Set Clock
You can use any of these you want to get things rolling. You’ll have to enable your network through the PCLinuxOS Control Center because MiniMe does not setup a network connection by design out of the box. Remember, it’s a base for building, not a full fledged distro. We have to craft it how we want it. I recommend NOT installing a graphics driver until the very end…mainly because there are some problems currently with the 173.xx driver conflicting with some packages in the testing repository. So hold off on graphics install if you can until the very last.
Make LiveCD is exactly what it sounds like. You can make a LiveCD based on your install. So after you get everything setup the way you want it to be, you can double click Make LiveCD and a wizard will guide you through creating your own customized LiveCD backup of your install.
Make LiveUSB is also exactly what it sounds like…you can make a bootable version of a USB stick with PCLinuxOS MiniME. This how-to does not cover this since we’re going for a desktop replacement and not a minimalistic install. You may want to select this option though after you’ve got things configured as you want them.
The rest of the options are fairly straightforward and do exactly what they say. Make sure you take the time to get all things working (except graphics driver) before you move on.
What Else Should We Install?
We’ll need to install a few more things to get seamless operation for PCLinuxOS on the web. There are also some packages that will make your PCLinuxOS experience a bit better that we’ll install at this step as well:
- gtk-qt-engine
- RealPlayer-rpnp
- flash-player-plugin
- java-1.6.0-sun
- flac-1.2.1
- mplayer-skins
- mplayer-gui
- mplayer
- win32-codecs-all
- sound-juicer
- flash-player-plugin-opera
- cabextract (for extracting wireless drivers if you have need to)
- webcore-fonts
- unrar
- rar
- xine-plugins
- AdobeReader_enu
Please remember to allow synaptic to mark anything extra that the packages require. After installing these packages, your browsing experience and overall appearance of PCLinuxOS should be ready for improvement. I’ll go through how I setup a few applications to give them a nice look and feel. Let’s start first with GTK applications look and feel.
Setup gtk-qt-engine in PCLinuxOS
Open the KDE Control Center and look under “Appearance and Themes” for the section “GTK Styles and Fonts”. Use the drop down menu to pick out your favorite GTK theme…and if your favorite isn’t there, fire up Synaptic again and do a search for it…chances are, it is there. Once you’ve chosen a style (I use clearlooks) click “Ok”.
This package gives your GTK applications a Gnome Feel in KDE. Without it, things look ugly. Face-in-pillow-to-be-kind-to-burglars ugly.
Get Your Fonts Setup

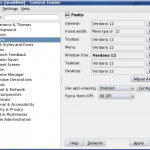
I setup my fonts a bit strange. I use the same webcore font (Microsoft Font) for almost everything because I like the way it looks. To do this, I set it up in the KDE Control Center and choose “Appearance & Themes” >> “Fonts”. Then, I setup each area except Fixed Width with Verdana for the font. You may like Ariel or another font…so choose it there. Don’t be afraid to experiment! Find fonts that suit you and make your desktop shine 🙂
When you’re through with the KDE Fonts, don’t forget to setup fonts in Firefox and Opera as well (if you desire to…I always do).
Setup KDE default Applications
While still inside the KDE Control Center, choose “KDE Components” and then “Component Chooser”. On this page, make sure your favorite applications are present as the default application for each area. Those to choose from are email client, text editor, instant messenger, terminal emulator, and web browser. For my email, I setup claws mail by clicking “use a different email client” and clicking the small square to browse applications. I did the same for web browser to make sure KDE knew to use Firefox and not Konqueror.
Enable Super Key for Compiz (if you use it)
If you use compiz and wanted to install it the package name is task-compiz-fusion-kde. Install this package but do NOT run it yet if you have an ATI or Nvidia card. We’ll need to install the graphics driver first. If you have another chip manufacturer (Intel, S3) for your graphics card, you should be able to install and use compiz right away.
To enable the super (windows) key, open the KDE Control Center, go to “Regional & Accessibility” and then to “Keyboard Layout”. Toggle check “enable keyboard layout” and make sure your region is in the right hand side box area as active. Click apply.
Setup Konversation in a Sane Manner

I think the default configuration of Konversation isn’t very friendly. So I take a few minutes when first firing it up to configure things. Perhaps you’ll agree with me on these. For example, I don’t like tabs on the bottom of my screen. I’d rather have those channels of chat on the left hand side so I can see them. I also like to have shell-like tabl completion. That means when I hit the tab key after typing a few letters of someones nickname, Konversation will complete their name without me typing it…much like the shell (konsole) can do with directory names. Start up Konversation. Click edit and then click the edit button again. Make sure you’ve input the nickname you need to input. If you are a freenode regular and have a registered nickname, enter NICKSERV and your password in the blanks under “Auto Identify”. Click “ok” twice and then connect.
Under “Settings” choose “Configure Konversation”. Go to the section “Behavior” and choose “General”. In “completion mode” use the drop down menu to select “Shell-Like”. I like to minimize Konversation into the tray and also like it to notify me when my name is mentioned. To do this, inside this same window toggle check “Enable System Tray” as well as the two other check boxes underneath it.
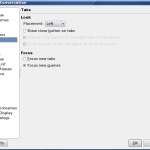
Now lets move the tabs to the left: Under “Interface” click “Tabs”. On the “placement” drop down menu choose “Left”. That’s it for Konversation.
Setup Kopete in a Sane Manner

If you use Kopete instead of Pidgin, I’ll walk you through setting it up so that it has a more pidgin appearance. When you first launch Kopete, it will prompt you to setup your accounts. You should have no problem setting up all but the gtalk ones. Go ahead and setup all the other ones…we’ll set gtalk up in a second. First, let’s get the existing ones to display in a sane manner.
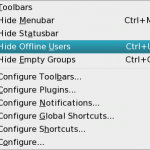
Under “Settings” choose “Hide Offline Users”. Then choose “Hide Empty Groups”. This will make sure not to display your offline buddies (of which I have too many all the time) in Kopete.
Next choose “Settings” and “Configure”. Click on Appearance. Click the “Chat Window” tab and choose “Get New”. A window will pop open with new themes to install. I like the theme called Fresh so I highlight it and click the install button. Close out all the windows except the configure one and then highlight “Fresh.AdiumMessageStyle” to switch to it. Click Apply.
Now click on the “Contact List” tab. Un-check “Arrange metacontacts by group” & “Show tree branch lines”. Under “List Style” choose right aligned status icons” and then check the “Use contact photos when available” checkbox. Click Apply.
I like my messages to open only one window with a new conversation opening a new tab. This prevents me from having 3 windows pop from 3 different chats from friends. Click on the “Behavior” icon on the left side of Kopete. Click on the “Chat” tab. Under “Chat Window Grouping Policy” choose “Group All Messages in Same Chat Window”. Click on the “Events” tab and make sure to uncheck “Show bubble” (unless you like notification bubbles…I hate them…I just want Kopete to flash on notification). Click Apply.
Click on the “General” tab. Make sure that the checkbox for the system tray is checked. Check the “Connect automatically at startup” box or Kopete won’t connect when you start it up. Toggle the radio button for “Open Messages Instantly”. Click Apply. Click Ok.
That should be it…I know it’s a lot but this really makes Kopete feel at home for me…almost pidgin style with better KDE integration.
Setup your gtalk follow the instructions here and make sure that if you are prompted with a pop up window choose never show this again and accept (it’s certificates for SSL and gtalk).
Improve Firefox Performance
There are tons of guides out there. I’ve looked through many of them to try and tweak Firefox performance and the one I’ve found to be the best collection of handy tips and tricks is at hugpages. Pay close attention to #13 which is the speedup I found to really make a difference.
KDE Artwork…Add More!!
I wrote an article on how to beautify the PCLinuxOS 2007 Desktop through installation of icon themes, cursor thems, wallpapers, and other improvements. Make sure that you check that post out and customize PCLinuxOS Minime 2008 and make it your own 🙂 That beautification article is still valid for Minime 2008, which uses the 2007 repositories. Some of the package names may have changed but you can use the search button in synaptic to search “description and name” and find most if not all the packages.
Graphics Card

Setting up your graphics card is last for good reason. It should be the last thing you do unless your resolution is so horrible you need to set it up at the beginning. There is a problem with Nvidia drivers and minime. If you installed the 173.xx drivers and try to upgrade to testing, it will flag a bunch of problems. To fix things, launch konsole, su to root and apt-get clean, then apt-get autoclean.
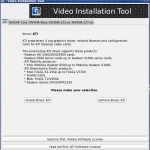
After doing that, apt-get update and then close konsole. Use the utilities folder on the desktop to un-install the 173.xx drivers. Then perform the testing upgrade without the drivers conflicting. After the upgrade is complete, install the 177.xx drivers. This is only for the latest and greatest video cards. REMEMBER, the utilities folder has a graphics card installation tool. This is used for ATI and Nvidia cards and will install the official driver for both. A list of chipsets for each driver is inside the utility (screenshot on right) so make sure that you pick the correct driver.
If you use any other chipset besides Nvidia or ATI, your driver should be enabled by default.
Extra TidBits I like to Install
I like to be able to right click any music file in Konqueror and convert it to any format I choose. This can be done with the audiokonverter package. Search for that in Synaptic and install it if you’d like to do the same.
Ever want to search through programs you can install without opening Syanptic and without using the command line? Install kio-apt and you’ll be able to do jus that using apt:/ in the address bar where the url normally goes. Options include:
apt:/search?search expression
apt:/show?package
apt:/policy?package
apt:/list?package
apt:/fsearch?package
Want to resize your screen on the fly? Press Alt-F2 and type krandrtray. Notice the small icon that appears inside your kicker tray by the clock. You’ll now be able to resize your screen resolution on the fly. This is sometimes handy for those users who dock a laptop that has a different resolution on laptop screens than desktop ones.
Miss the Nvidia Icon in your tray like in Windows? Install nvdock and then execute it from the menu (System >> Nvidia Dock) and watch as your nvidia icon magically reappears. Right click and be brought to Nvidia Control Panel Settings.
Want some desktop search action without google desktop or the beast that is Beagle? Not a fan of tracker? Try recoll which can be installed through Synaptic.
Need a personal wiki to keep notes? I know I do. That’s why I install zim which is a personal wiki written in GTK. It allows you to quickly jot down notes and scales quickly to even provide multiple page and project tracking for your own personal notes.
Ever run across stuff on the web you wish you could clip out of a webpage and save? Enter basket. It can handle images, webpage snippets, store URLs and anything you might come across, can be saved for easy centralized access.
Screensavers are not installed by default. If you want to install screensavers, try the following packages:
- xscreensaver
- xscreensaver-base
- xscreensaver-common
- xscreensaver-extrusion
- xscreensaver-gl
- xscreensaver-matrix
Did I Miss Anything?
Did I miss anything with my helpful how-to? If so, please leave me a comment letting me know what you’d like to see added to it. I will consider this a working how-to and update it with as much as I can. These are only the applications I find useful and use on a daily basis. I installed these on a fresh install of Minime 2008 on my main system and wrote this how-to while doing it. I wanted it to be minimalistic…I don’t need much in order to be happy. Hopefully, this helps inspire you t

PCLinuxOS memang true desktop OS deh, saya saja salut ma distro yang satu ini, begitu juga dengan turunan-turunannya, seperti SAM Linux. wah mantaf
Thanks a lot…