Have you ever been using your Linux distro and suddenly found a program won’t close? It’s frustrating when an application hangs. In Windows, one could right click on the taskbar and choose “Task Manager” and kill the hanging process (which doesn’t always work BTW). In Linux, you can also kill these hanging processes.
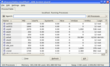 First, if you’re using KDE press Control-Escape. This will give all processes in a handy window called the KDE System Guard. Clicking the column heading for “System %” so the arrow on it appears facing up will sort the processes from highest system percentage to lowest. Find the process that seems to be hogging up all the resources (or if you know the name of the process, highlight that) and then hit the kill button. Your process should end it’s routines and exit.
You can also check out which program is hogging up your virtual memory with its process which can also slow things up. Clicking on the column “VmSize” and sorting largest to smallest will allow you to see this and select which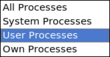 process to kill. I often elect to select only user processes using the drop down menu at the top right hand corner of the KDE System Guard. Doing this filters out all system files and shows any hanging applications that are initiated by the user (which is often what is hanging for me).
Don’t worry if you see the same process more than once (for example, Apache or php may have multiple entries if you run a webserver…this is normal). If you’re using Gnome, you’ll either have to use the console method I explain below or launch the Gnome System Manager to get things rolling. Since I don’t use Gnome, I won’t cover the Gnome System Manager here.
Another way you can do things…especially if all Xwindows (KDE, Gnome, Fluxbox, etc) have frozen or are sluggish is to drop to a console. You can do this by killing the Xserver or by dropping to a console. You can press Alt-F2 or Alt-F3 and get directly to a console. Login as root. Now let’s take a look and see what processes are hogging up resources. Kill the Xserver and drop to a console by hitting Control-Alt-Backspace. For our purposes, I’ll assume you’ve made it to the console now.
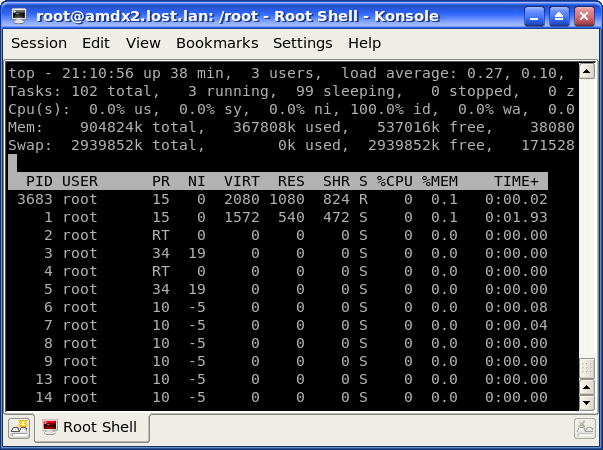
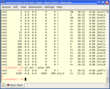
 There’s a quick console way of finding exactly what is consuming the most of your PC as far as processes are concerned. Using the the ‘top’ command will display those processes that are beasts and allow you to take note of them. Look for the process taking up the most CPU% (which should appear at the ‘top’ of your ‘top’ output). Pay specific attention to the PID column of that high CPU% item and make a note of it. This is the process ID number and every program running on a Linux box is assigned one by the Kernel. We’ve found the one making problems for us and have recorded the PID so let’s slay it. Hit Control-C to stop the top command and then type:
kill PID
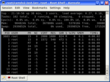
Where PID is the process ID number you made a note of before. You may not get confirmation that the task has been immediately killed so let’s see if it is still running. We may not get the information we need by using top again since it is mainly for finding the higher consuming processes aka runaways. Instead, let’s use the ps command.
ps aux | more
This command outputs all processes in a nice way…using the | and ‘more’ command allows you to paginate the output so that if there are a TON of processes, you can use the spacebar or arrow keys to page down (you can do that with any command too BTW). Now look for that PID that we just killed in the second column and see if it is there. You could also get creative and use:
ps aux | grep PID
Where PID is once again the PID you killed. The grep command will search through the results and echo back to you any matching entries it finds. If you didn’t find anything and couldn’t match your PID to that of any displayed in your ps aux command, you just successfully killed that beastly process. As always, for more information, please see the man pages (e.g. man ps or man top).
Hopefully, this allows you to more efficiently manage your processes…runaway or normal. If I’ve printed an error, please let me know via the comments below or if there is a more efficient way of doing things let me know there as well…I’m always open to improvement.
UPDATE: Please checkout the comments section for a few more tips on killing processes!
UPDATE2: Reader Scott M writes in the comments below “You don’t have to use the PID. You can use the -f option. e.g. if there are multiple instance of SomeProgram, you can kill them all with one command:
pkill -9 -f SomeProgram” Thanks Scott!