Security 101 – Passwords for the Web

In the past few weeks, I’ve come to realize 2 things.  First, the collegiate football (American) offseason is somewhat boring…bring on the SEASON!  Second, people’s Gmail accounts are getting hacked….a lot.  I’ve seen 2 of my friends have their accounts hacked in the past month and a half.

While there is nothing I can do about the first one, there is something I can do about the second.

I figured it might be a good idea to share how I generate passwords for web resources like Gmail and any other web based service.  I can do this in ANY browser…Opera, Chromium, and Firefox…and any operating system; because I use a tool called LastPass.

LastPass is a password vault for your browser.  It can remember any password you type on the web and it can also fill out forms for you (if you’d like).  I’ve been using it for about years now but have only recently taken advantage of their handy tools to generate passwords.  I’m going to walk you through setting it up in Firefox and generating passwords.  Hopefully, this will inspire you to change your password to something a little more complex to thwart hackers.

First of course, install the add-on/extension.  This process will differ depending on your browser.  Once LastPass is installed, make sure you sign up for an account or sign in to your existing one.  Remember, LastPass allows you to use a master password to keep a lock on your entire array of of websites you visit.  It takes security a step further by way of password generation.

Password Generation

You already have passwords for email, Facebook, Twitter, and other places on the web.  Is your password complex enough to thwart hackers attempts to crack it?  Most likely the answer is no…and if that’s the case, it would be a great idea to change your passwords to randomly generated ones and use last pass to remember it.  Imagine your password being the following:

hank65yankees

With LastPass it can become

S&Wllj98oCDFZ*

Which one seems harder for hackers to figure out to you?  So let’s get started.  During the installation for LastPass it should have told you how to access the menu…either through a standard menu or perhaps a button.  Once you access the LastPass menu, look for ‘tools’ and then choose ‘Generate Secure Password’.

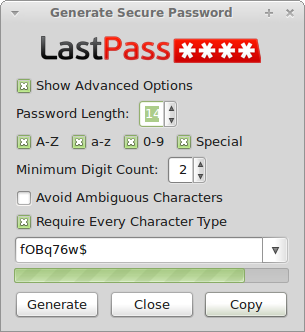
This should bring up the LastPass password generation tool.  It will look something like this:
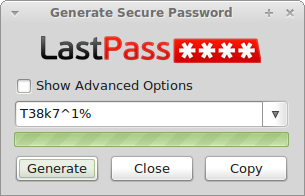
LastPass Password GeneratorAs you can see, the generator is ready to randomly generate more passwords for you by clicking the ‘generate’ button and you can copy it to your clipboard with the ‘copy’ button.  However, 8 digit passwords (default setting) may not be good enough for you.  In that case, click the ‘Show Advanced Options’ toggle.  This will bring up the following options:

Advanced Options

As you can see, you can increase the number of digits for password length…I’ve increased mine to 14 characters…and you can increase the Minimum Digit Count.  I’ve done so and moved it up to 2 digits.  Customize it however you like and once you have it set the way you like it, you can click ‘close’.  The options will save for the next time you go to generate a password.

Changing the Password

Now it’s time for us to actually change a password.  How do we do this?  Well, if you already had a LastPass account, you can visit your password vault and search for the site you would like to change.  Once you find it, you can open up the password generator and generate a new password…then edit the site inside your password vault and paste the new password.  Your job isn’t over yet though as you need to go to the actual site and change the password there as well.

If you haven’t used LastPass before, just visit the site you would like to change the password at and login.  LastPass will detect that you’re logging in and will ask if you want to remember the site you just logged in to.  You should select ‘save site’.

After you’ve logged in, go to whatever password change link the site provides and go ahead and change the password using the LastPass password generation tool pictured above.  LastPass should detect that you’re changing the password and ask if you want to update the site.  Remember, you can always manually edit the password inside the LastPass Vault.

Why Generate Passwords

I’ve shown this process to people I work with in Information Technology and they scoff at this idea of having randomly generated passwords.  They often say ‘how will I remember the randomly generated password?’ and that’s the beauty of LastPass.  It remembers so you don’t have to.  Once I tell them this, they generally move onto the question ‘well, what do I do if LastPass isn’t installed on the computer I’m using?’ and once again, the solution is LastPass.  Just head over to www.lastpass.com and login using your account details.  You’ll be redirected to your online password vault.  You’ll be able to fully manage everything as if you were using the extension in your browser.  You’ll also be able to copy and paste passwords by clicking ‘edit’ on the sites and ‘show’ beside the password field.  Sure it’s a bit more work…but it’s also quite a bit more secure.

Don’t put your trust in things you think are difficult for hackers to guess…chances are, it isn’t that hard for them to do so…allow LastPass to randomly generate them for you.  That way, you’ll never have your email account hacked like my friends did these past few months…unless you really do want to support the sale of pharmaceuticals or would like to enhance certain appendages.  I hope this helps you to use secure passwords in the future!  If you have questions, please let me know in the comments and I’ll do my best to answer them!  Thanks for reading!

CrunchBang Linux Review

I love CrunchBang Linux.  In my opinion, it’s one of the best distributions of Linux for older computers (heck, any computer) that is actively developed.

I pieced together a Gateway M250 laptop a year or so ago (3 bad ones parted out into 1 good one) and loaded it up with max RAM (2GB).  It’s now a handy little 14 inch laptop with a 1.73Ghz single core Centrino processor.  Not bad…but when playing videos or streaming them, it can really struggle.  So keeping the operating system lightweight on it is a definite must.

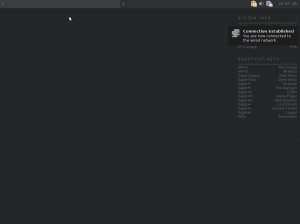
Enter, CrunchBang.  It’s small and fast.  It’s elegant and slick.  Just look at this screenshot:

Default Desktop

Simple and sleek, CrunchBang gives feelings of order and uniformity while breaking the speed limit signs.  I’d like to take some time to show you why I feel CrunchBang Linux should be the next distribution of Linux you put on your laptop.  Let’s get started…

Login Screen

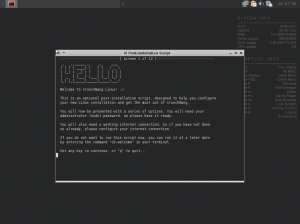
In the screenshot above we find the login screen that greets you after installing CrunchBang.  It’s very basic and sleek…it gives the impression that CrunchBang has things together.  It’s impressive but you won’t get to the most impressive portion of CrunchBang Linux until you login for the first time after installing.  I’m going to assume that you already have CrunchBang installed and are booting it for the first time in this review since the install is very easy to do.  After the installation, you’ll be greeted by a command line first run wizard (see below):

First Run Wizard

This wizard will take you through a plethora of tasks…including, but not limited to, getting you connected to the internet, installing development tools, installing web server tools, installing software development tools, and of course…updating your install.  You’ll be able to select each that you want to perform or skip each depending on your need/desire.  THIS is how a first run wizard should be.

This wizard is just a simple script but it does more in the first few minutes for new users than any first run wizard I’ve ever seen.  In my opinion, this tool puts CrunchBang head and shoulders above just about any other distribution of Linux out there.  This lightweight approach to things permeates the entire install.

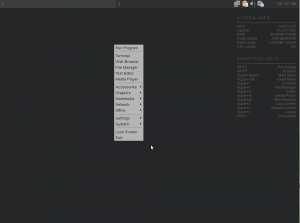
Now that you’ve made it through the first run wizard, we can explore the various applications installed by default.  For a list, please see the CrunchBang wiki entry.  I’ve found that there is a lightweight replacement for everything I’m accustomed to.  You access these applications by right clicking ON the desktop…which is the standard way to do this using the Openbox window manager.

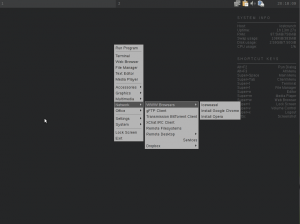
Right ClickAs you can see, there is a well organized menu structure for the applications that are installed and the appearance provides a uniform appearance just like all other areas of the distro do.  The theme is modern and elegant and continues throughout the menu structure.

browsersAre you a Firefox, Opera or Chromium fan?  Doesn’t matter.  Install scripts are provided inside the menu to get you the right browser right away.  Just a small detail that shows the creator of the distro isn’t thinking about only themselves but rather, the standard user.

I recommend CrunchBang Linux for ANYONE out there…regardless of skill level…who wants a lightweight, complete, and polished distribution of Linux with very few hassles.

Where Will You Hide the Bodhi?

Bodhi LinuxI had a brief flirtation with Bodhi Linux this past week.  I nuked my CrunchBang Linux install to give it a go.  It seemed pretty solid, but after spending some quality time with the distro, I found the version of Network Manager loved to randomly disconnect me from wireless networks…as in, right in the middle of me transferring files, streaming music, and doing tha IRC thing.  Very irritating.

I did a full update to the most recent released version (released in the past few weeks) and found e17 randomly crashing which wasn’t the best addition to a randomly disconnecting wireless connection…and I know that crashes aren’t a problem in e17 since the handler can just restart all the modules and BOOM you’re back.  Regardless, the Network Manager disconnection problem eventually irritated me enough to jump ship.  I attempted connman, exalt, and wicd but I found myself lost.  Since I haven’t used those tools before and the docs very scarce for uprooting Network Manager from Bodhi, it was a stopping point.  No worries, it’s still a great distribution and e17 is VERY fast and looks very good on this 7 year old laptop. However, CrunchBang called me back.

It just works.  Period.

It’s fast.  It’s openbox.  It smells tasty.  Ok, so I made up that last part…there isn’t a smell per se, but rather an overall polish that makes me want to use it.  So, inside a Starbucks in Eastern North Carolina, I buried a Bodhi and set out for home with a CrunchBang ISO.  I promised a review of CrunchBang anyway and it’s high time I started on it.  Let the distro hopping slow down for a while.

Feedly, Chromium , and Google Reader

How many of you use Google Chrome or Chromium and have more than 10 active feeds in Google Reader?  I’m sure that most of you raised your hand…well, maybe not physically but a mental raising of the hand I suppose.  How about 20+ feeds?  30+?  Is your (virtual) hand still up?  Mine is.

I’m plugged in…maybe too plugged in.  The “mark all items read” button received much use in my RSS reader.  I found myself skipping more than I actually read.  Google reader is awesome, don’t get me wrong, but it is a bit simplistic and plain…which is fine, it does its job well.  I’m informed.  But I often times find myself trying to sift through the cruft that is my various feeds.  I have wordpress design feeds, freelance feeds, Linux feeds, sports feeds, business feeds, inspirational feeds, youtube feeds, feeds about feeds, and feeds feeding those feeds.

Feedly
Feedly, RSS on Steroids

I wanted to get more from my news/RSS.  Enter Feedly.  Feedly is a way that my feeds become VISUAL.  Instead of line by line by line, I’m given tiles and mosaic patchworks in an easy to read format.  I have variety.  I have images.  I have screenshots.  I have thumbnails.  I can see my feeds.  I can see what they’re describing.  I can see what people are blogging about.  I started using Feedly a mere 4 days ago and I have completely caught up on my reading.  Before I started I had over 3000 articles and was many, many days behind on my reading.  I’m completely caught up now with a manageable 200  articles to read.

Does this mean I’m reading thousands of articles with Feedly?  Not by a long shot.  But I’m finding what is important to me faster and thus being much more efficient.  I’m still skipping many articles…but at least now I know WHAT I’m skipping.  I’m not just marking all read so that I can catch up.  Feedly allows me to peruse my feeds in almost a catalog fashion which speeds up my reading times and focuses my attention on the things that catch my eye.

Feedly is free by the way.  I use it with Chromium/Chrom (works with any web browser though, just head over to their website) and you can too.  Install it as a web application in the Chrome web store.  Once installed, synchronize it with your Google Reader account…things you mark as read in Feedly will be marked read in your Google Reader account and vice versa.  I also use it on my Android tablet.  Make sure to check out the settings page in Feedly to configure the right layout and colors for yourself to make things easier to read and fit your workflow.  I guarantee you will find yourself reading more interesting articles…bookmarking links more…and paying attention to what matters to you.

Thank You, Dear Reader

thank you!
Photo by woodleywonderworks

Thank you, dear reader.

Thanks for making Yet Another Linux Blog one of the top Linux Blogs on the planet!  It was an average day over 8 years ago that I began to host my own blog at linuxblog.sytes.net (thanks No-Ip.com!) on a PII that I inherited from one of my friends.  Slackware Linux hosted the project then and I wanted to use my new blog to explore the Linux world posting tips, tricks, and how-to’s on my way.  Millions upon millions of pageviews and 6 hosting changes later, we arrive here…at the end of 2011.

So am I throwing in the towel since I didn’t post regularly in 2011?  Heck no.  I’m going to continue learning and posting, exploring and writing.  In fact, I’ve made it a resolution to do more posting this year than I ever have to develop my writing as I begin to supplement my technical writing portfolio.  Technical Writing would be my profession of choice if this were a perfect world…getting paid to help people is something I find very satisfying.  For now, I freelance and am looking to possibly make freelancing become my full time job.

Once again, thanks for making Yet Another Linux Blog be a stop in your browser…thanks for making it be a blip on your RSS reader….thanks for your support and continued reading 🙂

Old Computer? No Problem! Linux Saves The Day.

Want to know what utilizes 54.3 MB of RAM idle at 1% CPU utilization on a Gateway M250 laptopCrunchBang Linux, that’s what!

It’s always a breath of fresh air when you are able to resurrect older hardware that most people would throw right into the trash with a dash of Linux.

Granted, this M250 laptop isn’t in its default config…I’ve updated it from 512MB of RAM to 2GB of RAM…which puts it at the maximum it can recognize.  It is running a Pentium M 740 Processor that runs at 1.73 Ghz and was part of the Centrino line from Intel.  It’s not breaking any land speed records but it hums along nicely.  I can upgrade it still to a Pentium M 760 and then that too will be maxed out.  For now, this laptop would run Windows XP normally and probably not do a fantastic job at it with a bunch of apps installed.

With Linux, I can load it up with just about anything I want and things just work.  If you haven’t taken a look at CrunchBang Linux in a while, you should do so immediately.  It’s like straight up octane fuel for your older computers.  I’m pleased that CrunchBang uses Debian for its base so that I am not in want of obscure packages and it uses Openbox, one of my favorite window managers, for its default desktop.

During the writing of this article using Firefox…er Iceweasel 8.0…it’s humming nicely at 175MB of RAM being used and about 15% CPU.  Very pleased thus far.  I’ll include a screenshot below and I’ll do a more in depth review of CrunchBang soon.

Remember, don’t throw out your old computers/laptops.  Resurrect them with Linux…particularly a VERY well put together and nice distribution like CrunchBang Linux!


CrunchBang Linux
CrunchBang Linux

Creative Commons License
Except where otherwise noted, the content on this site is licensed under a Creative Commons Attribution-NonCommercial-ShareAlike 4.0 International License.